Codex or Claude Code connected to Blender can build a dungeon arch, place a treasure chest, light the room, inspect the result, and export the scene for a game engine. That part is real. The misleading part is the leap from that demo to “AI can now make a production-ready game for me.”
The useful version of this workflow is more grounded. Treat the coding agent as a fast junior technical artist: it can execute precise instructions, repeat tedious changes, write Blender automation, inspect screenshots, and move files into your game project. You still define the art direction, decide what “good” means, test the game with normal controls, and reject work that only looks finished from one camera angle.
This guide shows the complete workflow with a concrete target: a small modular dungeon kit that starts as a blockout in Blender and ends inside a playable game scene. It covers both Codex and Claude Code, the official and community Blender connectors, asset requirements, prompts, export checks, engine integration, real-world results, and the point where a human must take over.
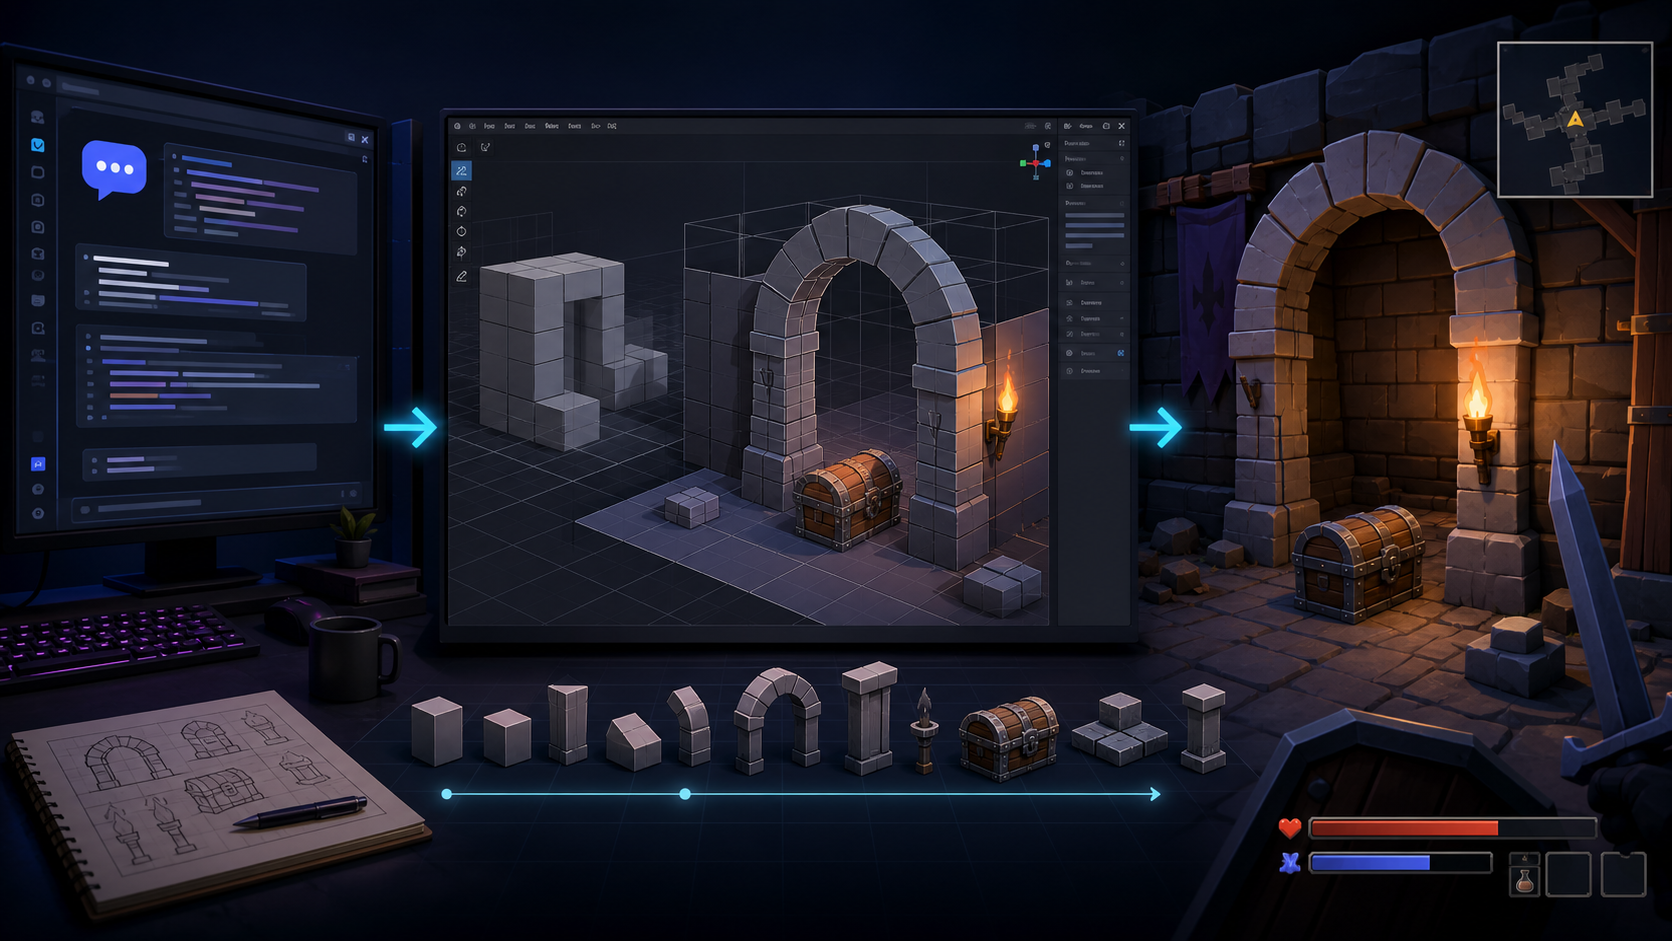
The Short Answer
Use Codex or Claude Code with Blender MCP when the job is repetitive, measurable, and easy to inspect: low-poly props, modular environment pieces, scene cleanup, object naming, material changes, simple collisions, export automation, and fast visual prototypes.
Do not hand over final responsibility for hero characters, deformation topology, UV quality, rigging, animation polish, level pacing, game feel, or asset licensing. An agent can help with those tasks, but it cannot be the only quality gate.
Strong Fit
Blockouts, low-poly props, modular kits, batch edits, naming, simple materials, collision helpers, previews, and exports.
Human Review Required
Topology, UVs, rigging, animation, art consistency, performance, gameplay readability, and level reachability.
Do Not Trust Blindly
Arbitrary script execution, unknown downloaded models, copied characters, “production ready” claims, or tests that skip normal player input.
What Blender MCP Actually Changes
Model Context Protocol, usually shortened to MCP, is an open standard that lets an AI application use external tools. In this case, the tools belong to Blender. The agent can ask what objects exist, create or modify meshes, change materials, run Blender Python, capture a viewport image, and export the result.
That creates a three-part system:
- Codex or Claude Code plans the work. It reads your asset specification, decides which Blender operations are needed, and keeps the game project files organized.
- Blender performs the 3D work. Geometry, materials, lighting, modifiers, animation, rendering, and export still happen inside Blender.
- The game engine proves whether the asset works. Godot, Unity, Unreal, or a web renderer reveals scale errors, broken materials, wrong pivots, missing collisions, and performance problems.
The Working Loop
The screenshots matter as much as the commands. Scene data can confirm that an arch is two meters wide. A screenshot can reveal that it looks too narrow next to the player. You need both forms of feedback.
Choose the Right Blender Connector
There are two Blender MCP routes that are often mixed together in tutorials.
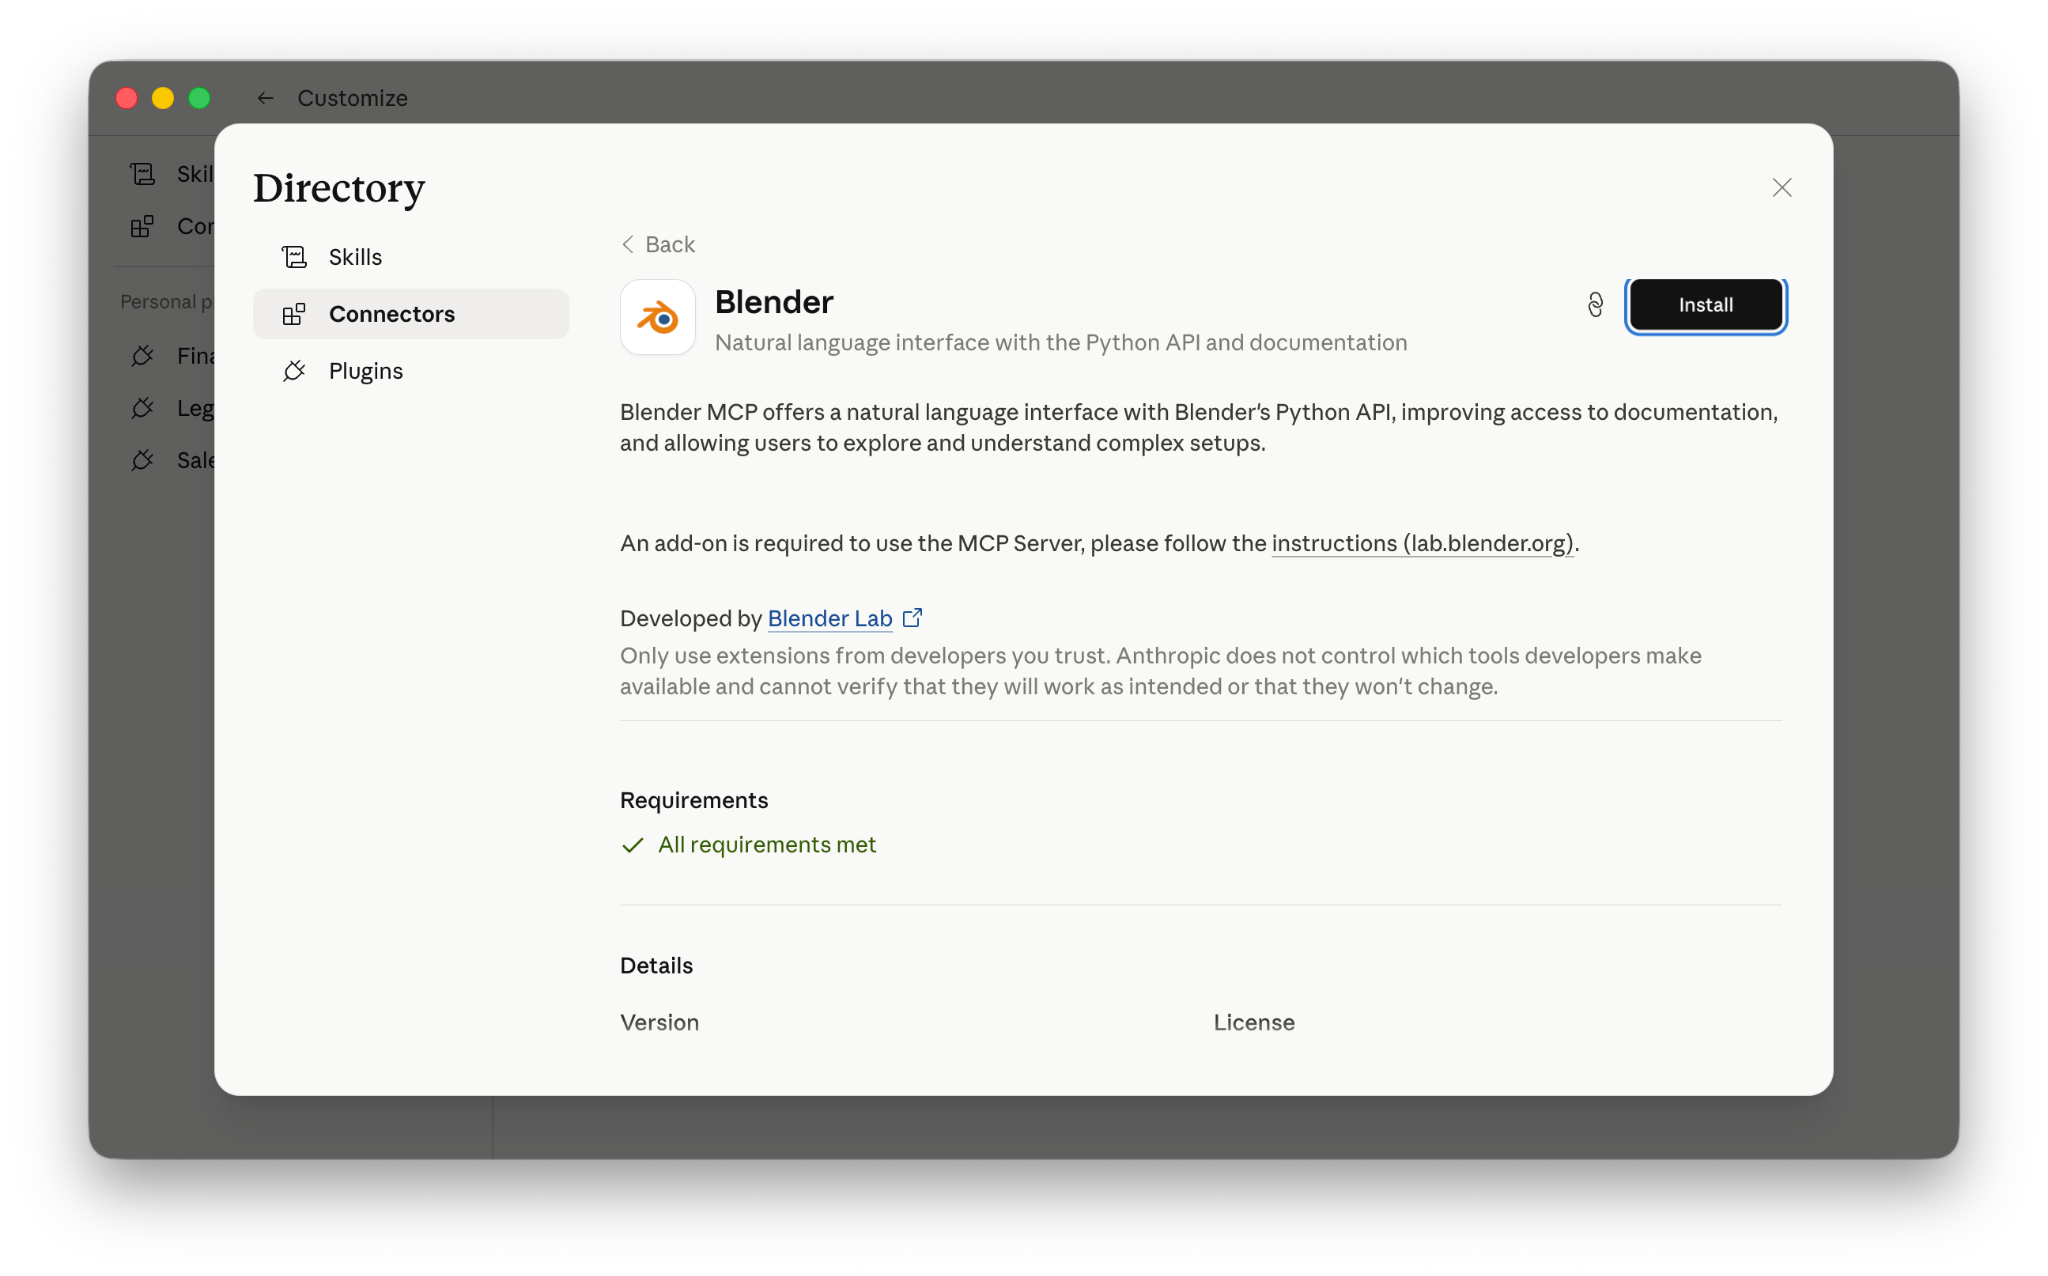
Option 1: The Blender Connector Built by Blender Developers
Anthropic's official tutorial describes a connector built by Blender developers and exposed through Blender's Python API. It can inspect scenes, explain nodes and modifiers, batch changes, clean up files, and add custom tools. The same MCP server can work with other compatible clients, including Claude Code.
Option 2: The Community BlenderMCP Project
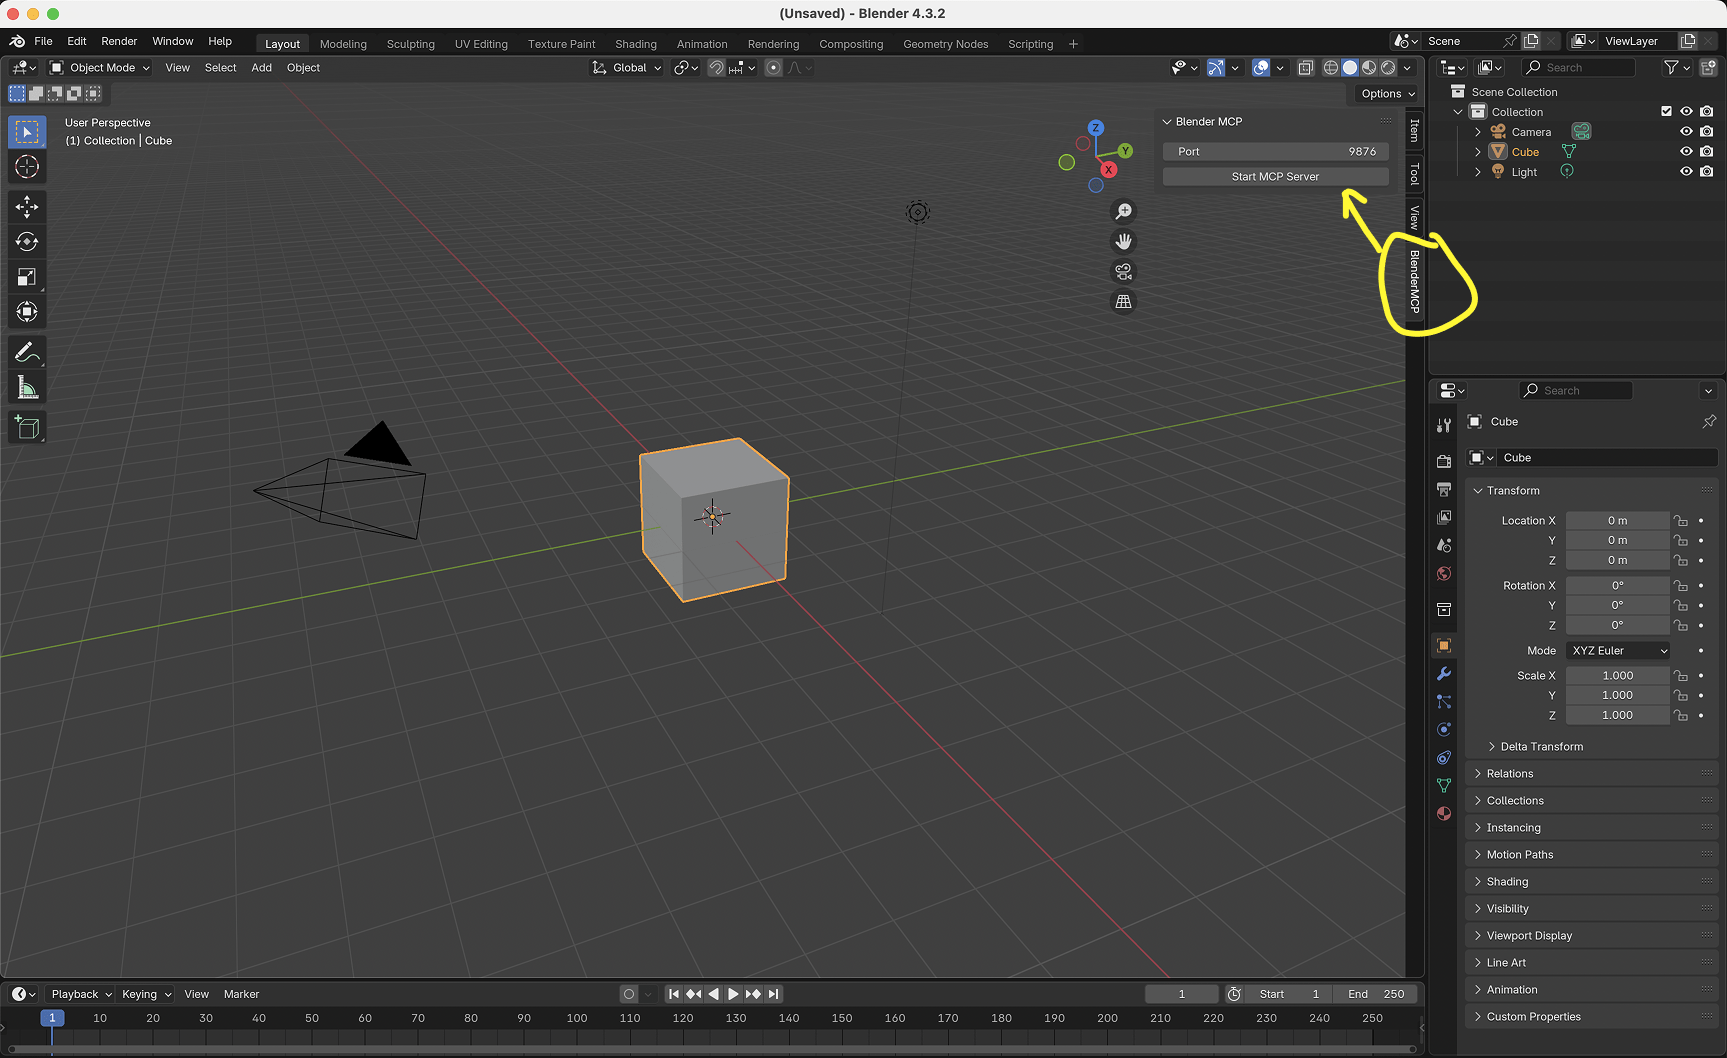
ahujasid/blender-mcp is the community project behind many viral demos. It connects an add-on inside Blender to a local MCP process. Beyond object and material operations, it can capture viewport screenshots and optionally search or generate assets through Poly Haven, Sketchfab, Hyper3D, and Hunyuan3D.
Start with the official connector if your first goal is to understand and modify existing Blender scenes. Use the community project when you specifically need its asset integrations or want to reproduce community workflows. Do not install both blindly and assume they expose the same tools.
Connect Codex or Claude Code
Both clients support local MCP servers. OpenAI's Codex documentation explains that Codex desktop, CLI, and the IDE extension share MCP configuration. Claude Code's documentation supports local, project, and user-level servers and requires a trust decision for project-shared configurations.
For the community BlenderMCP package, the minimal client commands are:
Codex
codex mcp add blender -- uvx blender-mcp
codex mcp list
Claude Code
claude mcp add blender -- uvx blender-mcp
claude mcp list
You also install the matching Blender add-on, enable it, open its panel in the 3D viewport, and start the local server. Then open the MCP status panel in your coding client and confirm that Blender tools are visible. Exact install details can change, so follow the connector's current documentation rather than copying an old package attachment from a tutorial.
First Connection Test
Do not begin with “make a medieval village.” Ask the agent to read the current scene, create one cube at a stated size, move it to an exact position, assign a color, take a screenshot, and save a new file. This tests reading, writing, visual feedback, and saving without risking a real project.
The Asset Brief Comes Before the Prompt
The difference between a demo object and a usable game asset is usually the specification. “Make a dungeon door” gives the agent permission to invent every important production decision. A useful asset brief removes that ambiguity.
For the dungeon kit in this guide, the brief should look like this:
| Decision | Dungeon Kit Requirement | How to Verify |
|---|---|---|
| Grid | 2-meter modular grid | Snap pieces into an 8 × 8 meter test room |
| Pieces | Wall, floor, arch, door frame, stair, column | No visible seams from the game camera |
| Style | Chunky low-poly fantasy, readable silhouette | Compare four views and a distant camera |
| Budget | One material per module, 1024 texture atlas | Inspect slots, image sizes, and triangle counts |
| Origin | Bottom corner for grid snapping | Rotate and place several copies |
| Delivery | Source blend file, GLB, thumbnail, simple collision | Import into the target engine and walk through it |
This brief is not bureaucracy. It gives the agent testable targets. If the arch is 1.7 meters wide instead of two meters, that is a fixable error. “The arch feels wrong” is much harder to automate.
A Prompt That Produces a Usable First Pass
Copyable Starting Prompt
Create a low-poly modular dungeon blockout on a 2-meter grid. Make six separate modules: straight wall, floor, arch, door frame, stair, and column. Use simple gray materials only. Put each object's origin at the bottom corner used for grid snapping. Name every object with the prefix DK_. Assemble one 8 × 8 meter test room from copies of the modules.
Do not add detailed textures, decorations, particles, or characters yet. After the blockout, report each object's dimensions and triangle count. Capture front, side, top, and game-camera screenshots. Check for gaps, overlap, inconsistent thickness, and pieces that do not align to the grid. Save a new Blender file before making any correction.
Notice what this prompt does not ask for: a cinematic dungeon, dramatic lore, dozens of props, or a finished art style. The first pass has one job—prove that the kit fits together.
The Seven-Step Asset Loop
1. Establish Scale and Orientation
Create a known reference: a two-meter measuring object or a player-sized capsule. Lock the forward axis, world up, unit scale, grid increment, and origin convention before making detailed geometry. If this changes later, every collision and animation becomes harder to repair.
2. Build the Blockout Only
Use boxes, cylinders, bevels, and simple modifiers. At this stage, judge silhouette, clearance, snapping, and gameplay readability. A doorway that looks impressive but blocks the camera has failed.
3. Inspect from Four Views
Ask for front, side, back, and game-camera views. Make the agent list what changed between revisions. Never approve a prop from the one angle used in the prompt. Thin backs, floating parts, reversed normals, and accidental intersections often hide behind the hero camera.
4. Add Structure and Materials
Only after the blockout passes should the agent add bevels, controlled variation, material nodes, UVs, or a texture atlas. Keep material slots low. If you plan to use GLB, stay close to common PBR inputs instead of building a Blender-only shader that cannot survive export.
5. Make It Game-Ready
Apply transforms, check normals, remove duplicate geometry, verify UVs, set the origin, add collision, and create LODs if the target scene needs them. The agent should produce a table with the final name, dimensions, triangles, materials, textures, collision type, and export file.
6. Export and Import Immediately
Do not finish ten assets before the first engine test. Export one representative module early. Godot recommends glTF 2.0, and GLB is convenient because it packs the scene into one file. Unity projects commonly use FBX or glTF-based workflows depending on the existing pipeline. Unreal's FBX static mesh pipeline supports materials, custom collisions, multiple UV sets, and LODs.
7. Test as a Player, Not as a Debugger
Walk through the arch using the game's normal controls. Test camera clipping, step height, shadows, collision edges, readability, and frame rate. If the agent teleports the player through the room and reports success, the asset has not passed a player test.
What a Real Codex + BlenderMCP Session Looks Like
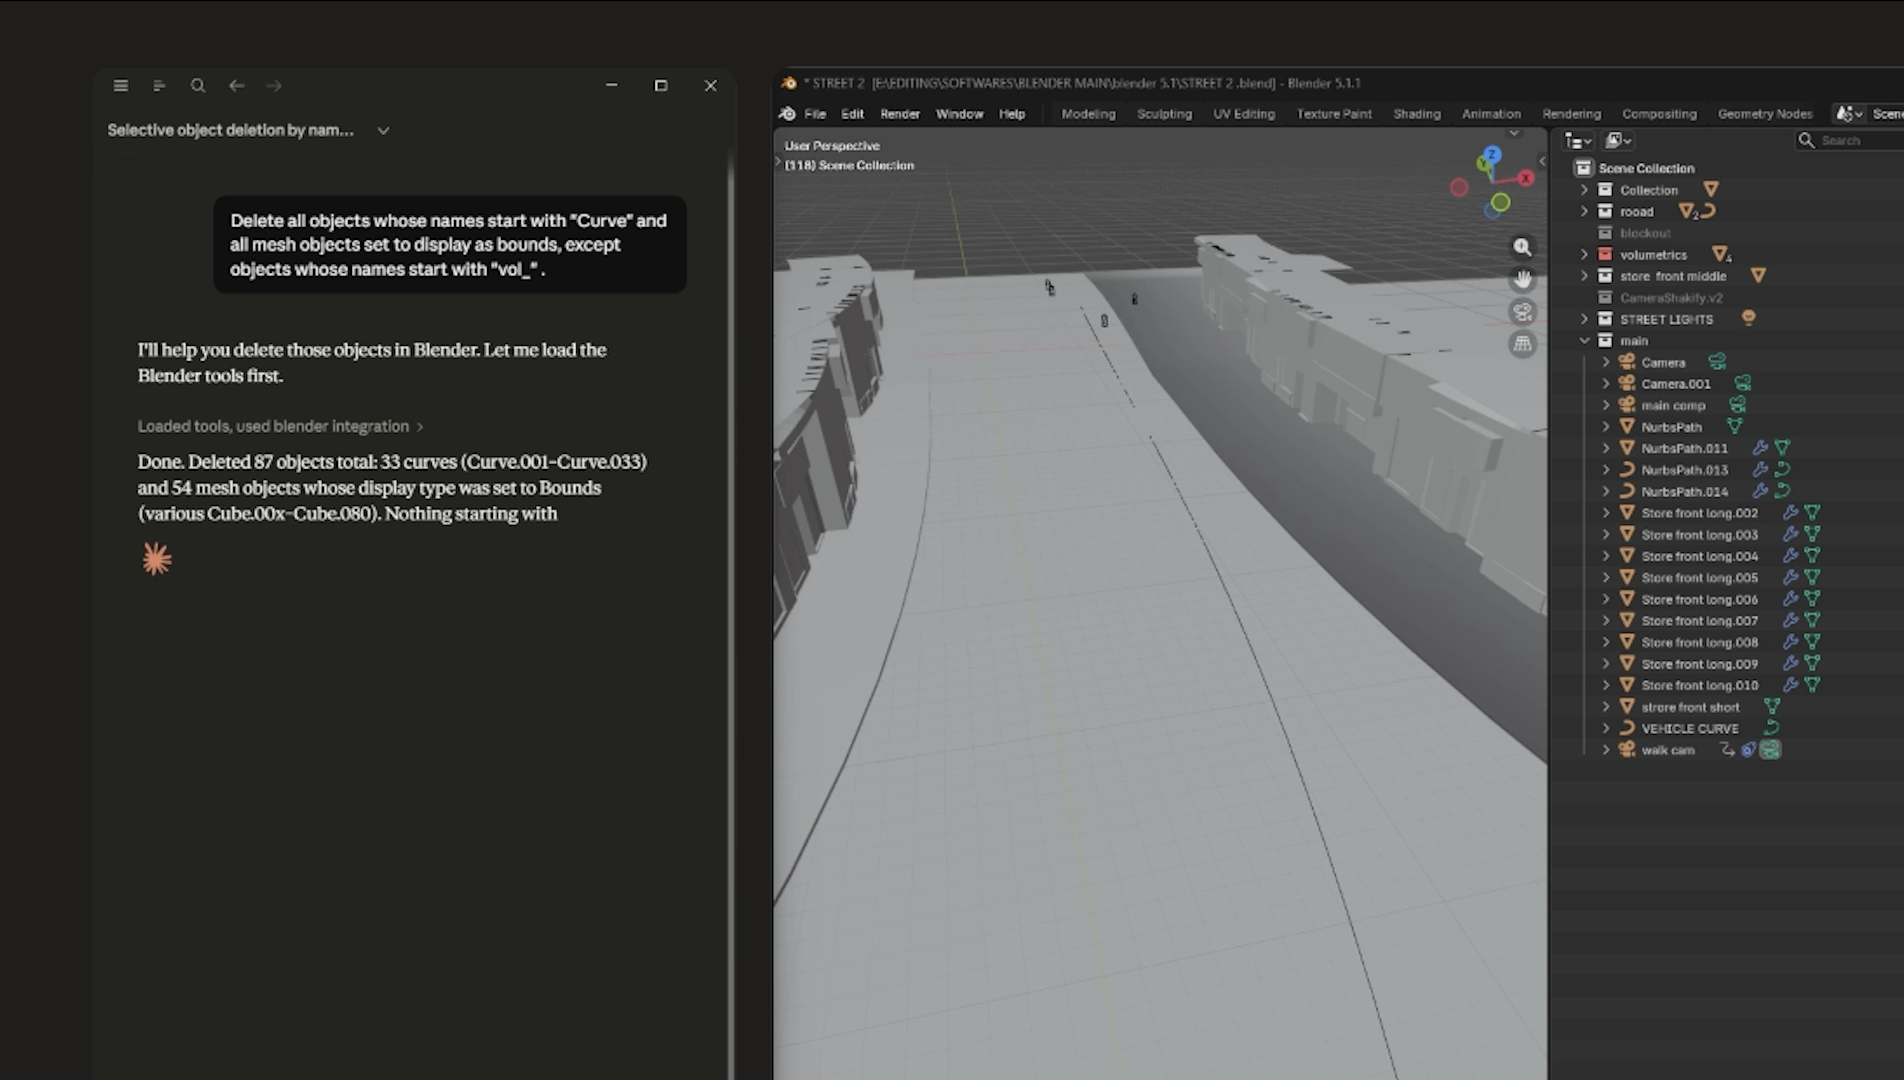
A detailed Codex and BlenderMCP test by kun432 connected Codex to Blender 5.1.1, confirmed the available Blender tools, and prompted a low-poly dungeon with a dragon guarding gold. The first scene established the room, columns, lighting, and dragon. A later turn added an adventuring party and spell effects.
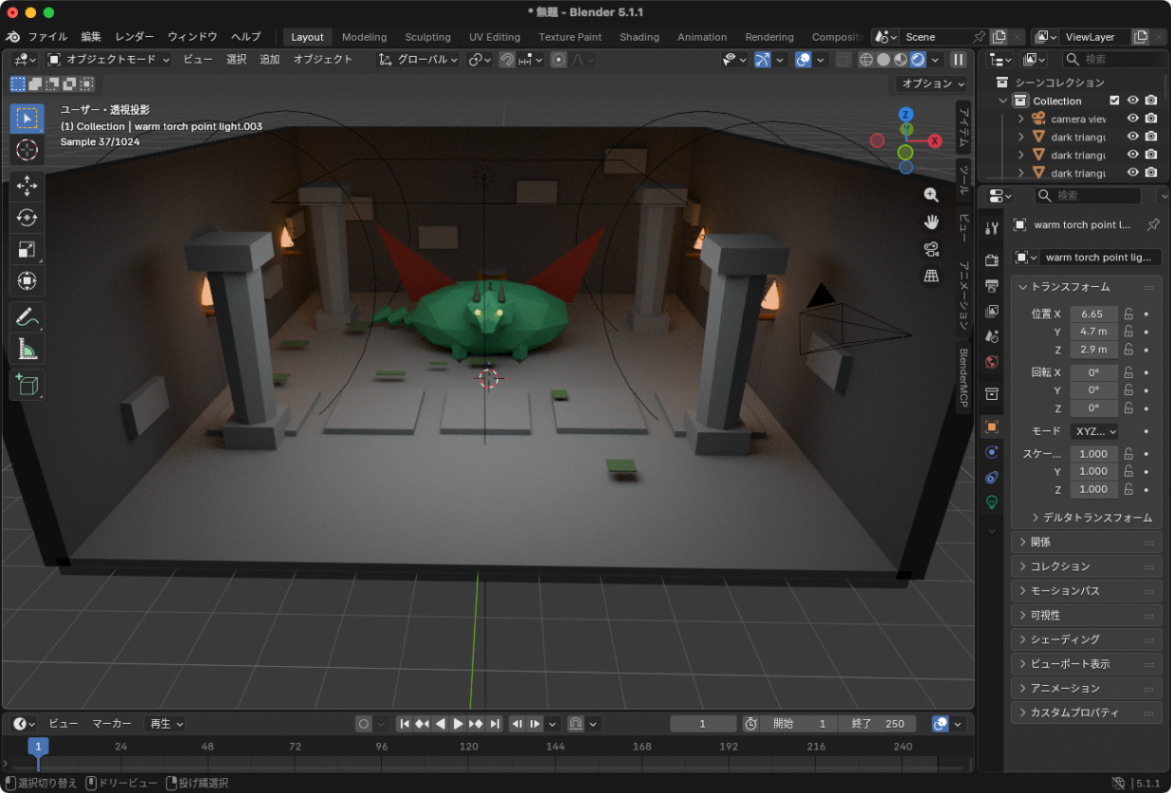
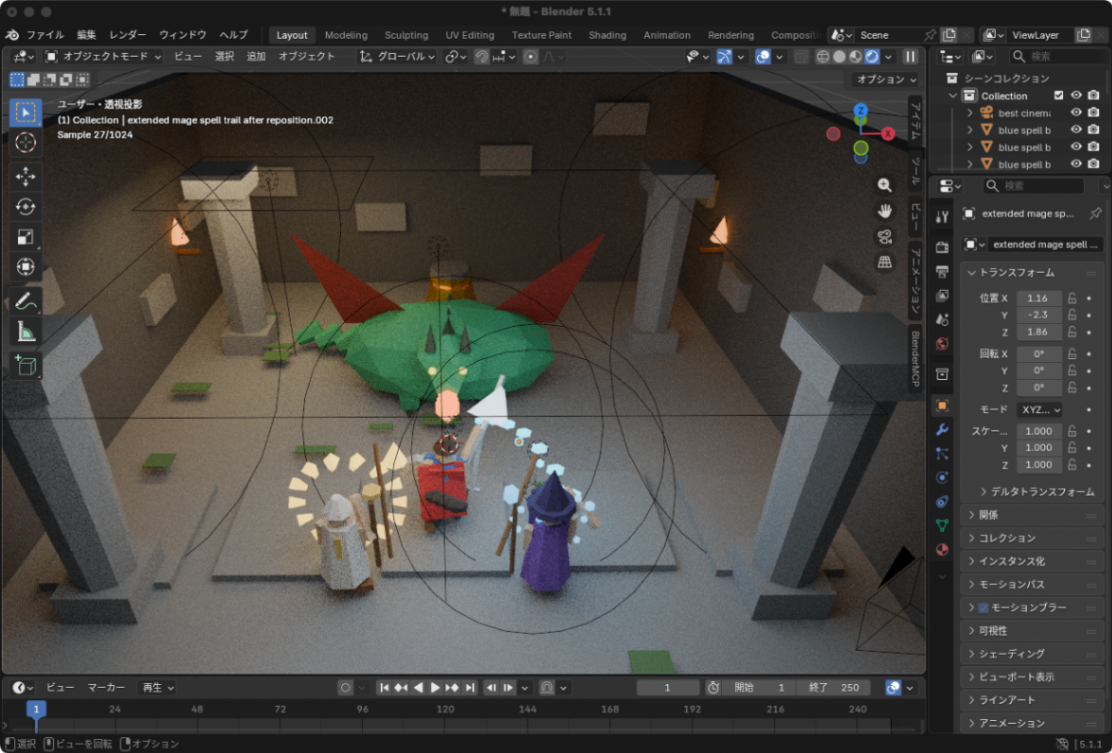
This is good evidence that Codex can drive a multi-step Blender scene. It is not evidence that the dragon has animation-ready topology, clean UVs, optimized materials, useful collisions, or a legal path to commercial release. Screenshots prove visual progress; production checks prove asset readiness.
Moving from Blender into the Game Engine
The lowest-risk game workflow starts with placeholders:
- Build movement, interaction, combat, and the win condition with primitive shapes.
- Record the exact dimensions and behaviors required from each asset.
- Create one Blender asset and import it.
- Replace one placeholder category at a time.
- Keep scripts, collision references, and spawn points unchanged unless the asset specification requires a change.
- Run the game after every replacement batch.
A community Codex + BlenderMCP development report used this exact separation: Codex first created a Three.js game with placeholder dragons, houses, and props; Blender assets were generated later, exported as GLB, and handed to another Codex task to replace the placeholders. That is a much safer architecture than asking one long conversation to invent the art, gameplay, asset format, and integration simultaneously.
The Unity Test That Shows the Real Limit
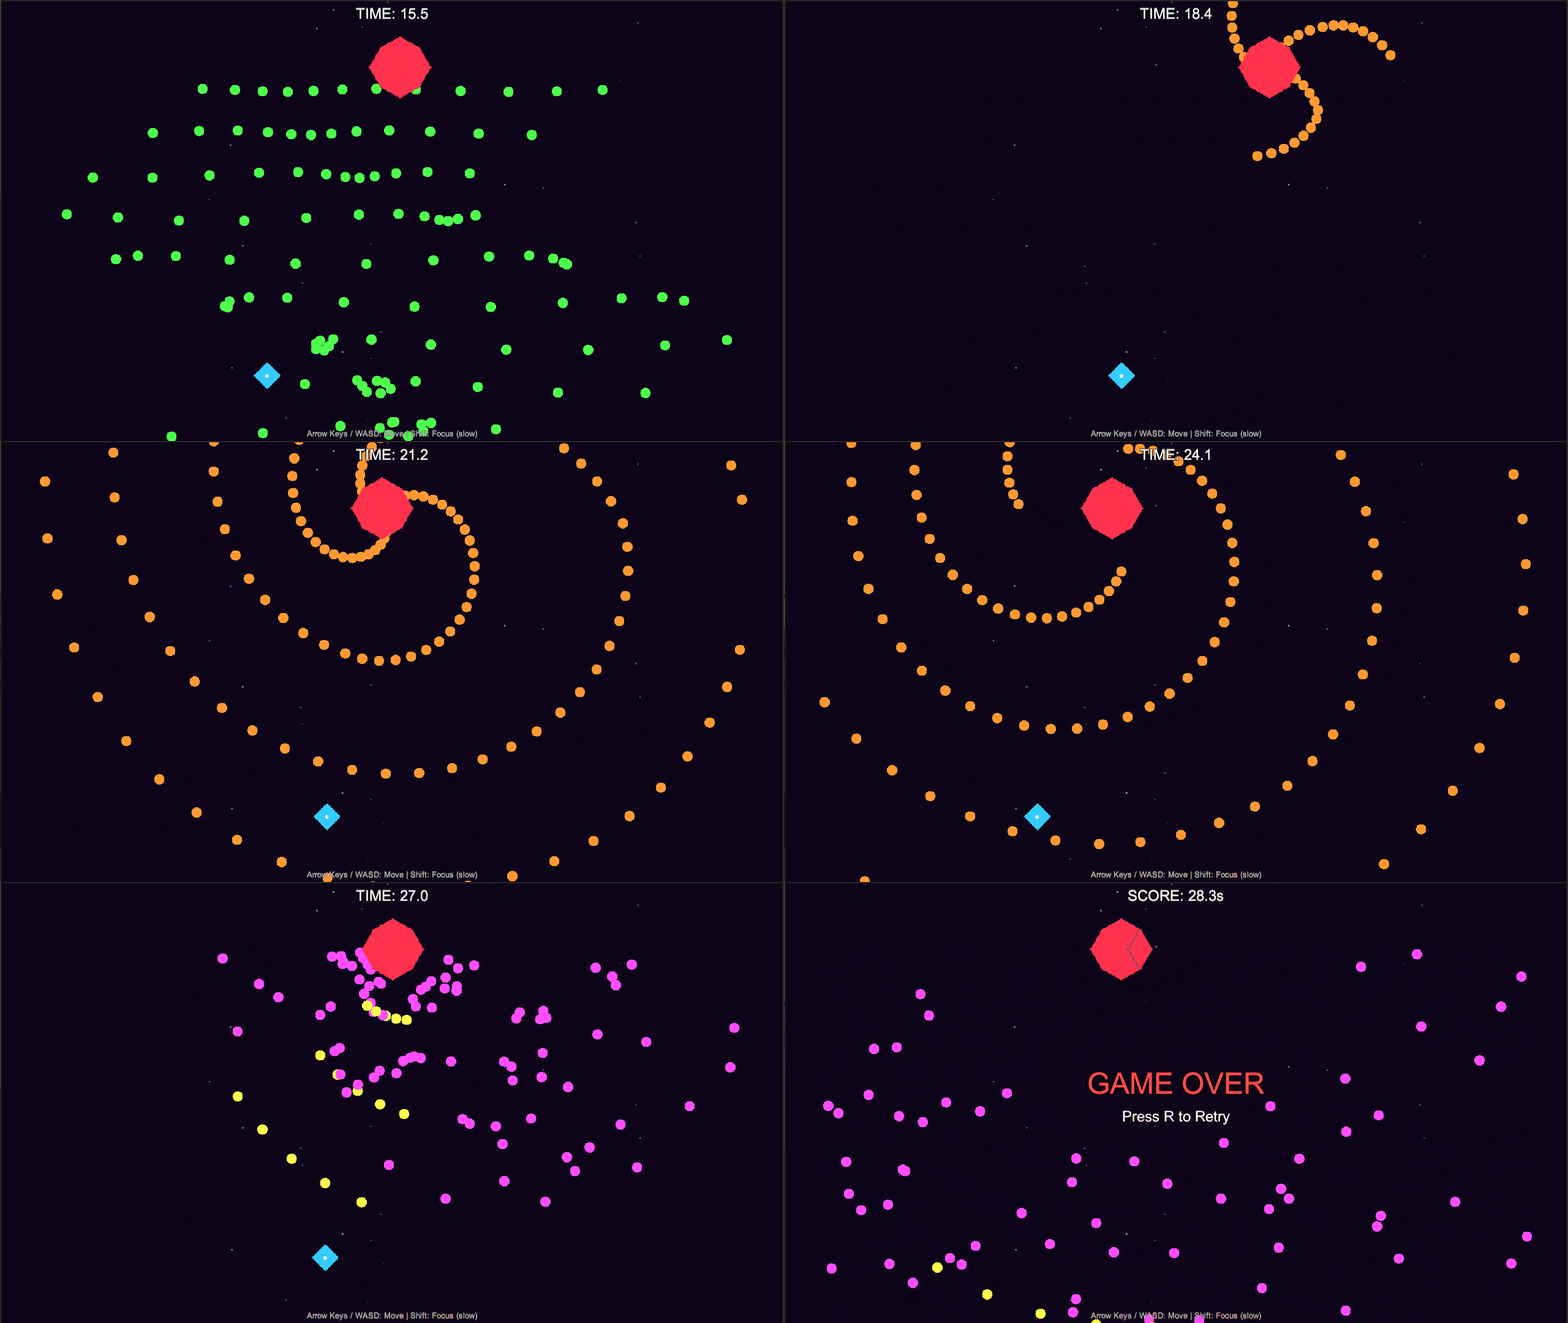
A 2026 DevelopersIO test of Claude Code with Unity MCP created three games from empty Unity projects. The results draw a useful line between simple systems and complex playability:
- A bullet-hell shooter took about 7.5 minutes for the first playable version. It was later changed to use a pool of 1,500 bullets with roughly 500–1,000 on screen, without an obvious editor frame-rate drop in the author's test.
- An auto-generated platformer took about nine minutes and worked on the first pass, although jump height and wall contact still had minor problems.
- An exploration dungeon took about 49 minutes and roughly 1,700 lines across ten files. Claude Code ran seven tests and fixed five issues—but the player still could not leave the starting room because the exit was too high to reach.
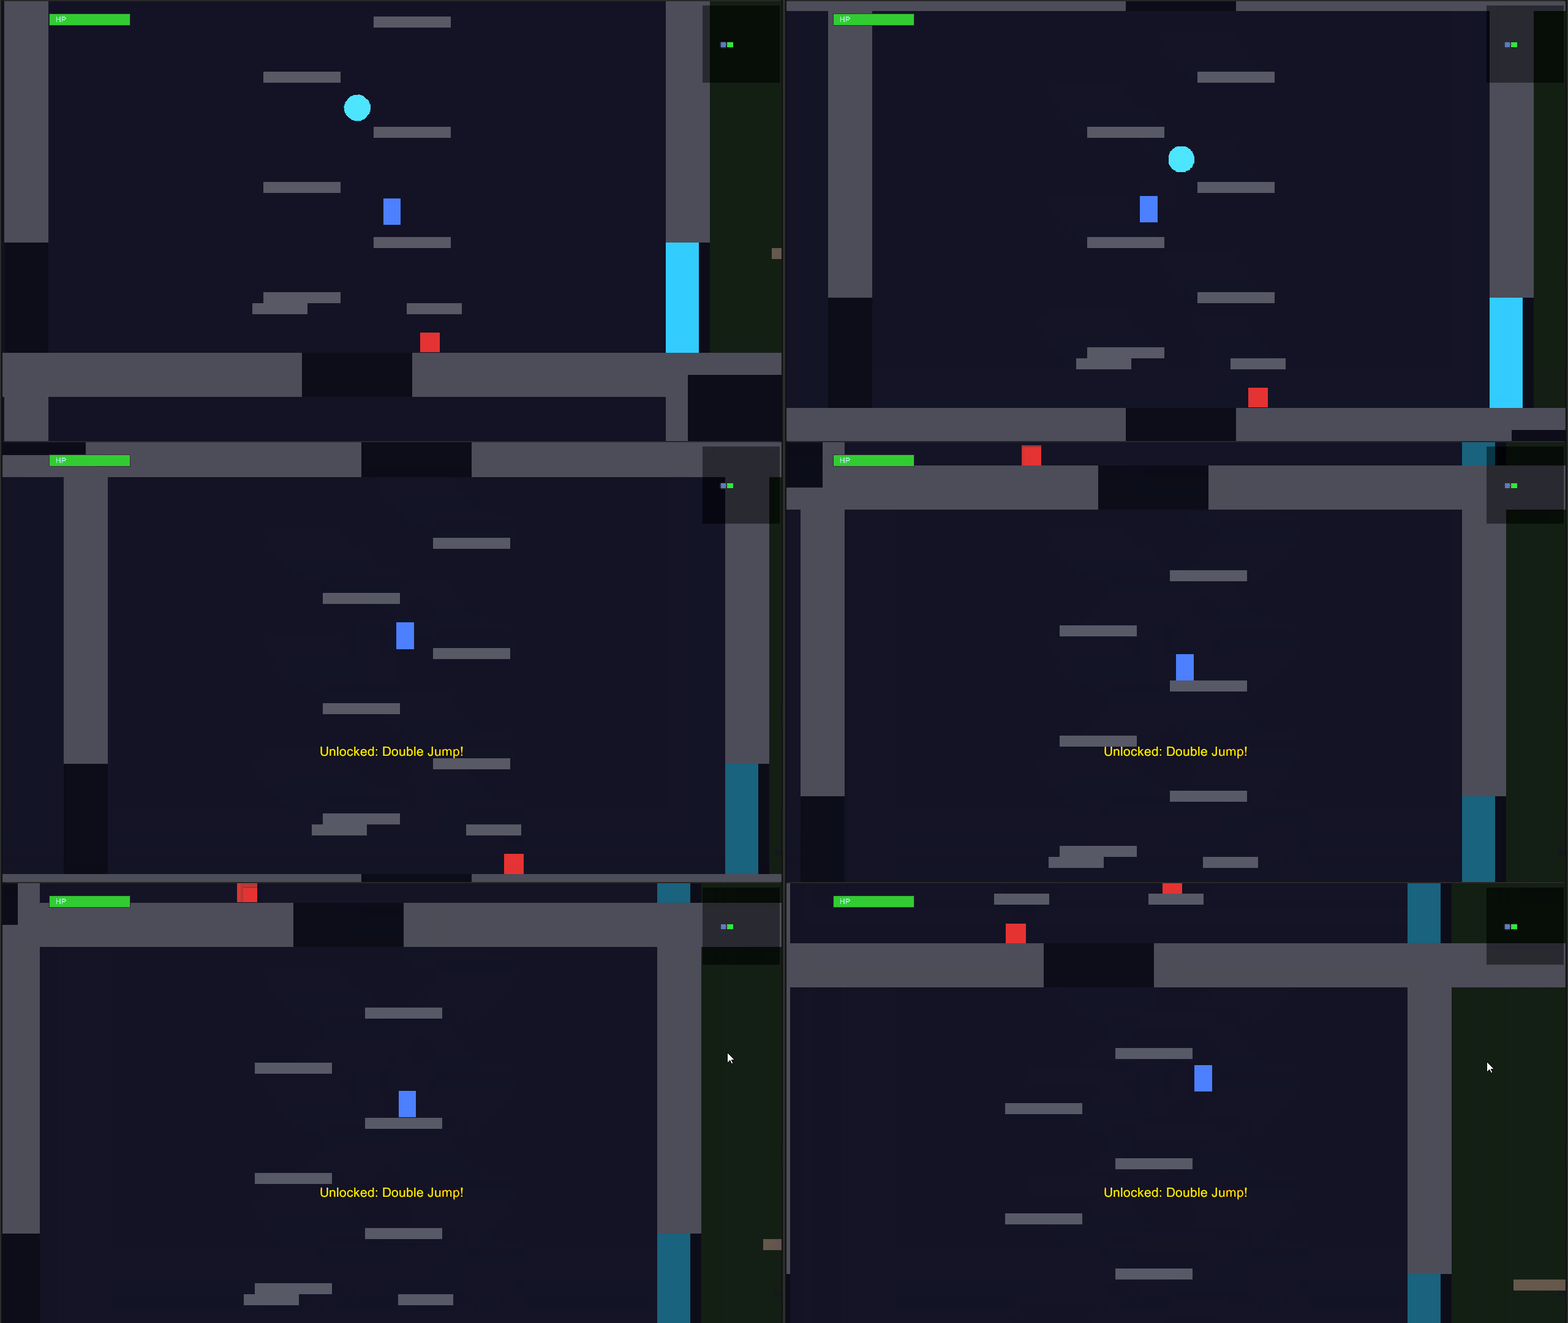
The agent's tests had teleported the character around to inspect room state. That proved the data structure worked, not that a player could traverse the level. After a correction, the starting-room problem was fixed, but repeated runs still found dead-end layouts.
This is the most important lesson in the entire guide: define tests as player behavior. “Every room exists” is not the same as “a player can reach every required room with the abilities available at that point.”
Where the Current Capability Ceiling Sits
The gap is visible in research as well as individual experiments. GameCraft-Bench evaluates 140 Godot tasks across 15 game families. Its strongest tested agent reached 41.46%, while most scored below 40%. Agents often produced recognizable mechanics but struggled with complete content, functional visual feedback, and coherent presentation.
AutoUE approached Unreal generation as a coordinated system: model retrieval, scene construction, gameplay code, engine-aware constraints, documentation retrieval, and automated testing. That structure matters. A game is not one task, so one giant prompt is a weak production plan.
The practical reading is not that agents are useless. It is that their strongest role is accelerating well-defined parts of a pipeline while humans own taste, game design, and final verification.
Security and Licensing Are Part of the Asset
The community BlenderMCP can execute Python inside Blender. That is powerful enough to create anything Blender's API allows, but it also gives the workflow broad local capability. The project's own documentation recommends saving before use, and a public security report describes the risk of unsanitized code execution and prompt injection.
Use a disposable test project first. Keep production credentials and private source art out of that environment. Approve high-impact tools manually. Treat text downloaded from websites, model descriptions, and unknown repositories as untrusted material, not instructions.
Downloaded assets need a license record:
- Poly Haven publishes its assets under CC0, allowing commercial use without required attribution, although credit is appreciated.
- Sketchfab assets can use different licenses. Editorial assets have restrictions that make them unsuitable for normal commercial game use.
- AI-generated models still need a record of the service terms, prompt, reference images, generation date, and human edits.
Create an asset manifest with source URL, creator, license, download date, changes, and final file name. If you cannot explain where an asset came from, it is not ready to ship.
A Seven-Day Proof Project
Before committing a real game's art pipeline to this workflow, run a small proof project: one low-poly dungeon room that takes five minutes to play.
- Day 1 — Graybox: movement, camera, one door, one key, one enemy, and one exit using primitive shapes.
- Day 2 — Rules: lock units, grid, axes, naming, material limits, triangle budgets, and export format.
- Day 3 — Modular kit: wall, floor, arch, stair, column, and door frame; assemble a test room and check seams.
- Day 4 — Props: chest, torch, key, and one enemy placeholder; import each asset before making the next.
- Day 5 — Materials and light: choose one consistent visual direction and test it under the actual game camera.
- Day 6 — Validation: check dimensions, origins, triangles, materials, collisions, licenses, and three full human playthroughs.
- Day 7 — Build and review: create a playable build, record a walkthrough, list every manual correction, and decide whether the time saving was real.
Pass Conditions
- No missing materials or broken textures after import.
- Every module snaps to the grid without visible gaps.
- The player crosses every doorway and stair using normal controls.
- Three complete playthroughs without teleporting or editing state.
- Every external asset has a recorded source and license.
- The target device meets the project's frame-rate goal.
FAQ
Can Codex control Blender through MCP?
Yes. Codex supports local MCP servers, and community tests show Codex connected to BlenderMCP, reading its tools and modifying Blender scenes. Compatibility does not guarantee that every connector version or Blender release will work without setup changes.
Does the official Blender connector work with Claude Code?
Anthropic's tutorial says the connector uses the open MCP standard and works with other MCP clients, including Claude Code. Follow the current Blender and Claude Code setup pages because installation details can change.
Which is better for game assets: Codex or Claude Code?
Both can coordinate the workflow. The more important factors are the connector's tools, the clarity of the asset brief, screenshot feedback, engine access, and the quality of your acceptance tests.
Can this workflow create production-ready 3D characters?
It can help with concepts, blockouts, repetitive edits, simple rigs, and automation. A production character still needs expert review of anatomy, topology, UVs, textures, weights, deformation, animation, performance, and style consistency.
Should I build assets before the game?
No. Prove the core loop with placeholders first. Stable gameplay gives each asset a real size, camera distance, collision shape, animation requirement, and performance budget.
What format should I export?
GLB/glTF is a strong default for Godot and web workflows. FBX remains common in Unity and Unreal pipelines. Use the format already tested by your target project, and keep the Blender source file.
Bottom Line
Codex or Claude Code plus Blender MCP is already useful for real game work, but only when the work is framed as a pipeline instead of a magic prompt. Give the agent measurable asset requirements. Inspect the result from multiple angles. Import early. Test with normal player controls. Keep a human in charge of taste, gameplay, and release decisions.
The best first project is not a whole open world. It is one small room with a strict asset budget, a complete gameplay loop, and an acceptance checklist. If that room survives export, integration, three playthroughs, and a license audit, you have the beginning of a production workflow—not just an impressive Blender screenshot.
Sources and Further Reading
- Model Context Protocol: What is MCP?
- OpenAI: Connect Codex to MCP servers
- Anthropic: Connect Claude Code to tools via MCP
- Anthropic: Using the Blender Connector in Claude
- Community BlenderMCP repository
- kun432: Testing Blender MCP with Codex
- DevelopersIO: Unity MCP and Claude Code game tests
- GameCraft-Bench
- AutoUE

Leave a Comment
Share your thoughts with the community